Free Online Tools for Every Need
ToolFlow is a free collection of 78+ browser-based online tools built for anyone who needs to get things done quickly — without paying for software, creating an account, or waiting for a download. Whether you need to merge a PDF, remove an image background, fix your grammar with AI, or create a QR code, you can do it right here in your browser.
Every tool on ToolFlow is completely free with no usage limits, no watermarks and no paywalls. Most tools process your files locally using the Canvas API, pdf-lib, or WebAssembly — which means your documents, images and data never leave your device. For AI writing tools, prompts are sent securely through our proxy to generate output; nothing is stored or logged. We built ToolFlow to be fast, private and accessible on any device, from any browser.
The toolkit covers five categories: PDF, Image, AI Writing, Text & Developer, and Utility tools — with new tools added regularly. Every tool opens instantly, works on both desktop and mobile, and requires zero installation or sign-up.
PDF Tools
ToolFlow's PDF tools cover every common document task without requiring Adobe Acrobat or any desktop software. Merge PDF combines multiple files into one document in seconds. Split PDF extracts specific pages into a new file. Compress PDF reduces file size while keeping text and images sharp — ideal for email attachments and upload portals with file-size limits.
For format conversion, PDF to Word and Word to PDF let you move freely between formats. PDF to JPG exports every page as a high-quality image, while JPG to PDF bundles images into a single document. Rotate PDF fixes sideways or upside-down scans. Unlock PDF removes restrictions from files you already have access to. All PDF processing runs using pdf-lib directly in your browser — your documents are never uploaded.
Image Tools
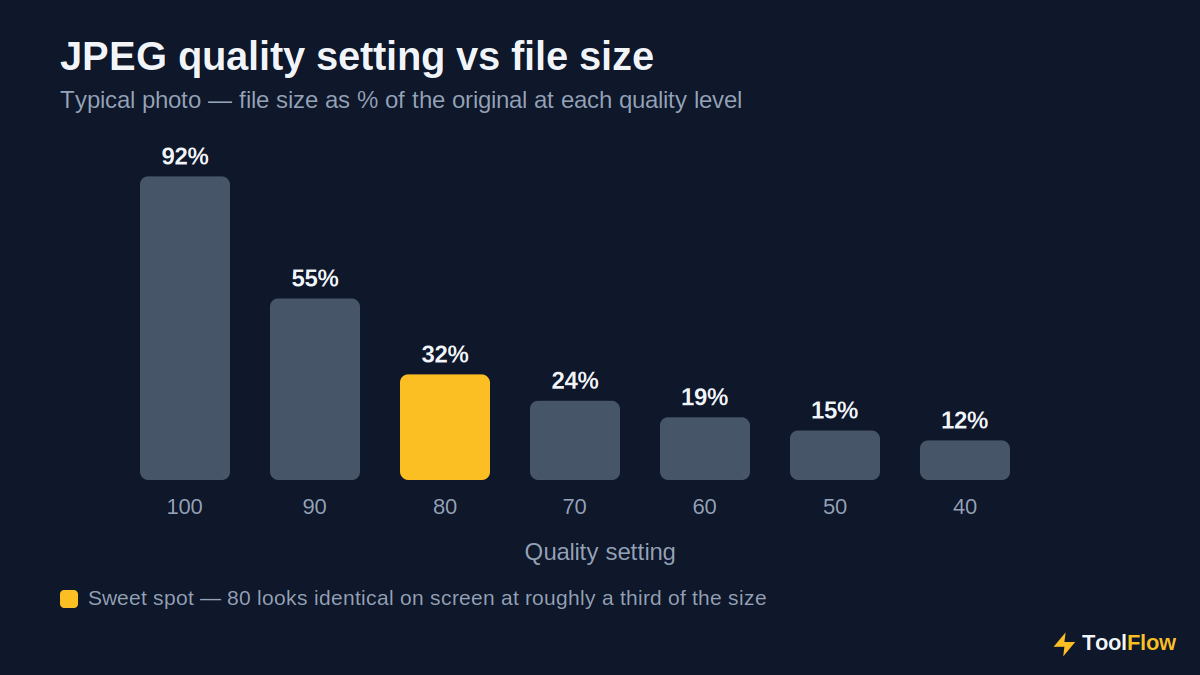
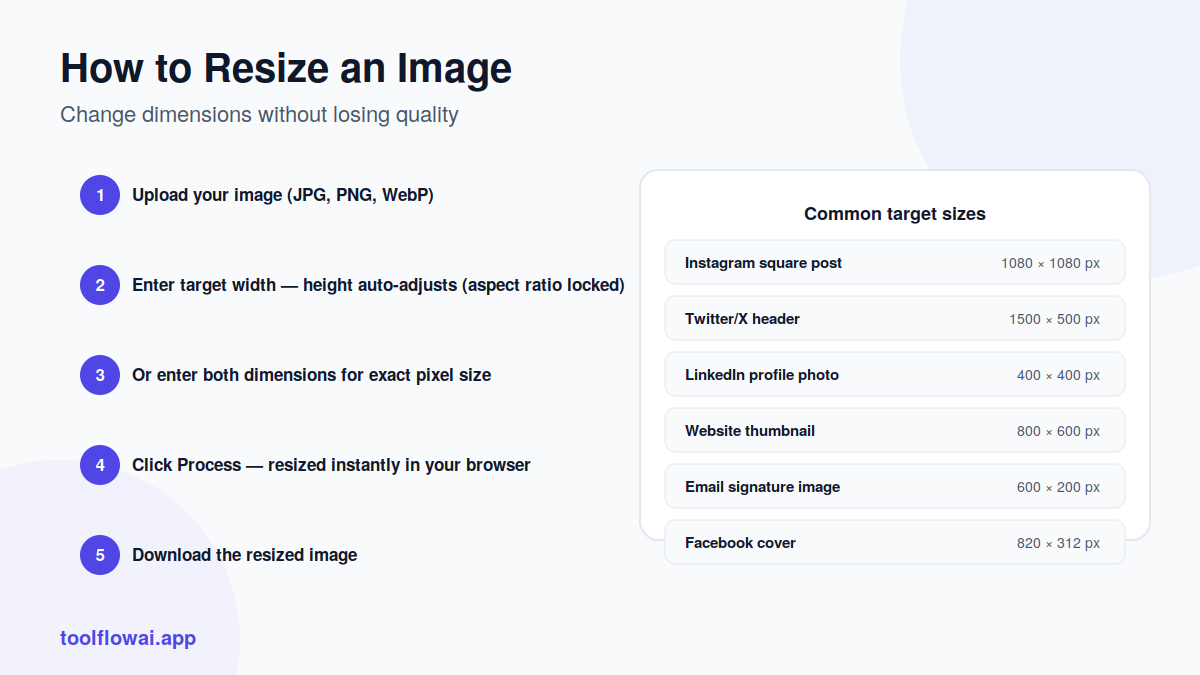
Image editing no longer requires Photoshop. ToolFlow's image tools handle the tasks that come up most often — for designers, developers, e-commerce sellers and everyday users alike. The Image Compressor reduces JPG and PNG file sizes by up to 80% with no visible quality loss, using quality 80 as the recommended web default. The Image Resizer scales images to any pixel dimension while preserving aspect ratio, and the Image Cropper lets you select and export any region of an image.
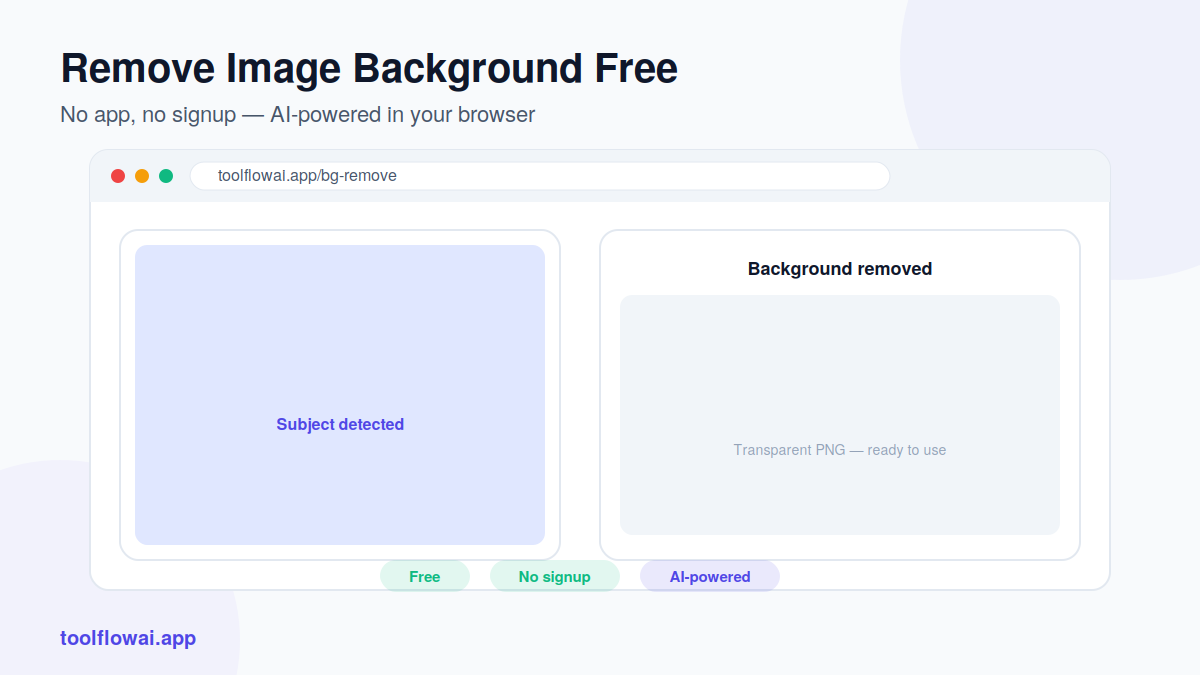
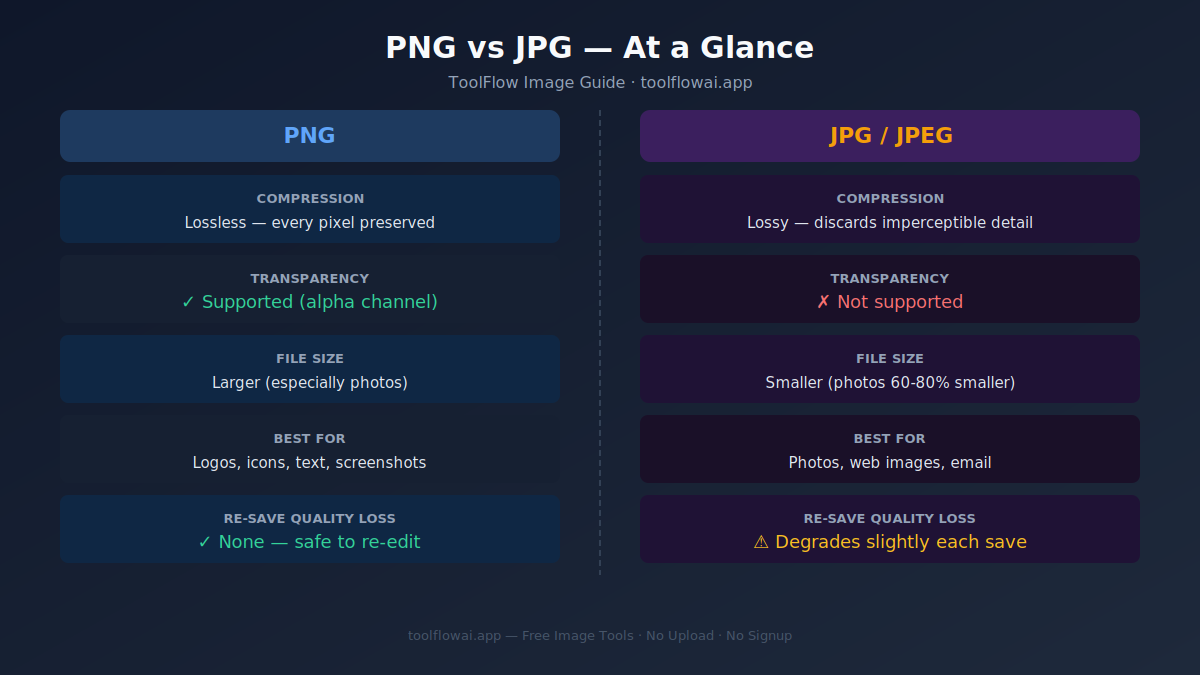
The Background Remover uses the RMBG-1.4 AI model — running in your browser via WebAssembly — to cut out subjects from photos with clean edges. The Image Upscaler enlarges images 2×, 3× or 4× using smooth scaling and a sharpening pass. It cannot add detail that was not in the original. For format conversion, PNG to JPG, JPG to PNG and the Image Converter (which also outputs WebP) handle the most common conversions. Blur Image rounds out the toolkit for creative and practical image editing.
AI Writing Tools
ToolFlow's AI writing tools are powered by GPT-4o mini, routed through a secure server proxy — no account, no credit system and no usage caps. They're designed for students who need a first draft, marketers who need copy at scale, small businesses that can't afford an agency, and creators who want to spend less time writing and more time creating.
The AI Article Writer generates complete, structured articles with an introduction, subheadings and conclusion in approximately 15 seconds. The AI Blog Generator and AI Writer handle shorter-form content. For editing existing text, the AI Rewriter paraphrases and rephrases in any tone, the AI Grammar Checker fixes errors and improves clarity, and the AI Content Improver enhances word choice and flow without changing your meaning.
Specialised tools include the AI Email Writer for professional correspondence, the AI Product Description Generator for Amazon, Shopify and Etsy listings, the AI Cover Letter Generator for job applications, and the AI Bio Generator for LinkedIn and speaker profiles. Social and marketing tools cover Instagram captions, ad copy, TikTok captions, hashtag generation and YouTube descriptions. For SEO, the AI SEO Title Generator and AI Meta Description Generator produce optimised titles and descriptions within character limits, with a live character count bar.
Developer & Text Tools
Text and developer tools handle the formatting, encoding and analysis tasks that come up constantly in writing and coding workflows. JSON Formatter and JSON Validator clean and validate JSON data instantly. HTML Formatter, HTML Minifier, CSS Minifier and JavaScript Minifier handle markup and code at both ends of the readability spectrum.
Base64 Encoder and Base64 Decoder convert strings and binary data for APIs and data URIs. The URL Encoder / Decoder handles percent-encoding for query strings. UUID Generator produces RFC-compliant unique identifiers on demand, and Lorem Ipsum Generator creates placeholder text in any length. For writing and publishing, Word Counter, Character Counter, Sentence Counter, Line Counter and Reading Time Calculator give you instant document statistics. Case Converter, Text Cleaner, Remove Duplicate Lines and Markdown to HTML round out the text processing toolkit. The Image to Text (OCR) tool extracts text from images, screenshots and scans using Tesseract.js in your browser, supporting 12 languages.
Utility Tools
ToolFlow's utility tools solve the everyday tasks that don't fit neatly into any other category. The QR Code Generator creates custom QR codes for URLs, text, contact cards and WiFi credentials, downloadable as high-resolution PNG. The Barcode Generator produces standard barcodes for retail and inventory use.
For security, the Password Generator creates cryptographically strong random passwords with custom length and character rules, and the Password Strength Checker evaluates passwords against entropy and common-pattern criteria — both run entirely in your browser with nothing sent to a server. Color Picker and Color Converter handle HEX, RGB, HSL and more. Unit Converter covers length, weight, temperature, area, volume and speed. Currency Converter provides live exchange rates. Age Calculator and Percentage Calculator handle quick arithmetic, and Random Number Generator produces truly random values for any range.
Why Choose ToolFlow?
- Completely free — every tool, every time, no premium tier
- No registration or account required
- No software to install — works in any modern browser
- Most tools process files locally, so your data never leaves your device
- Fast results — most tools produce output in under 5 seconds
- Mobile-friendly — every tool is responsive and touch-optimised
- No watermarks, usage caps or hidden limits
- 78+ tools across 6 categories, with new tools added regularly
Frequently Asked Questions
Are ToolFlow tools really free?
Yes — completely. Every tool on ToolFlow is free with no usage limits, no credit system and no watermarks. There is no premium plan and no paywall. ToolFlow is monetised through unobtrusive display advertising, so the tools themselves are always free.
Do I need to create an account or sign up?
No account, no email address, no sign-up of any kind. You can use every tool on ToolFlow without registering. Open a tool, use it, done.
Are my files uploaded to your servers?
Most tools — including all PDF tools, image tools and text tools — process files entirely in your browser using local APIs. Your files are never sent to a server. AI writing tools send your text prompt to our secure proxy to generate a response; the prompt is not stored or logged.
Do I need to install any software?
No. ToolFlow runs entirely in your web browser. There is nothing to download or install. Tools that need heavy processing, like the Background Remover, download a small AI model file to your browser cache on first use, so subsequent uses are instant.
Can I use ToolFlow on my phone or tablet?
Yes. Every tool is designed to work on desktop, tablet and mobile. The layout adapts to any screen size, and file upload, processing and download all work on iOS and Android browsers.
Which browsers does ToolFlow support?
ToolFlow works in all modern browsers: Chrome, Firefox, Safari, Edge and Opera. Chrome and Edge generally offer the best performance for tools that use WebAssembly (such as the Background Remover). Internet Explorer is not supported.
How many tools does ToolFlow offer?
Currently 78+ tools across five categories: PDF, Image, AI Writing, Text & Developer, and Utility. New tools are added regularly — check the homepage for the latest additions.
Can I use ToolFlow for commercial work?
Yes. There are no restrictions on using ToolFlow tools for personal, professional or commercial projects. Output from ToolFlow tools — including AI-generated content — belongs to you.
How accurate is the AI Grammar Checker compared to Grammarly?
The AI Grammar Checker catches grammatical errors, spelling mistakes, punctuation issues and awkward phrasing. It performs comparably to Grammarly's free tier for standard grammar correction. Unlike Grammarly, it requires no account and has no usage limits.
Is ToolFlow safe to use for sensitive documents?
For PDF, image and text tools, yes — processing happens locally in your browser and your files are never uploaded. For AI writing tools, text prompts are sent through our proxy but are not stored or associated with any identity. We recommend against inputting highly sensitive personal information (passwords, financial data, medical records) into any online tool.